Showing posts with label linux. Show all posts
Basic Terminal Commands For Linux

What Is Terminal ?
Basically you are reading this tutorial because you are new to linux or want to learn using terminal to navigate. Before you get started you must have linux installed or running virtually on your computer. I would recommend downloading fedora or ubuntu (If you have trouble installing ubuntu leave a comment below and i will post a tutorial).Commands To Remember
This are some of commands you must remember which will help you to use terminal more easily.ls - it will list all files and folder in your current directory
ls -l it will give detailt listing of all files and folders
ls -a it will list all files and folder in your current directory including hidden files (files and folders that begin with period)
pwd will print your working directory or simply your current directory
Navigating In Terminal
Here i may refer folder as directory so dont get confused. This is the term we use in linux for folders.cd - cd stands for change directory. we use cd follow by path address to navigate ro that folder.
Eg: cd Desktop will make desktop as my current directory.
cd / will make root as you current directory
cd ~ will make home as your current directory
Typing cd alone is same as cd ~ and it will make home as your current directory
cd .. will make parent directory i.e directory above your current directory
cd ../../ will take you two folder up
Creating Files And Folder
mkdir - we use mkdir follow by path or folder name to create a directoryEg mkdir car will create directory car in your current directory
to create folder recursively i.e folder inside folder inside folder we use -p flag
Eg mkdir -p vehicles/car/truck will create directory vehicles in your current directory which have car inside it and car has directory truck in it.
touch - we use touch follow by file name to create empty file.
Removing Files And Folders
rmdir - we use rmdir follow by path to to remove any directory. This will not work if folder you are trying to remove has something in it.rm -r to remove file recursively which can not be removed by rmdir
rm - We use this command to remove files
Tag :
linux
What Is Phishing And How To Be Safe From Phishing ?

Phishing is one of the type of hacking . It is a method of acquiring sensitive information such as username, password, bank information etc. Phishing page could be said as an duplicate page of real one. Its look exactly similar as the real page.But when user enter sensitive information on such phishing page his information is send to the E-mail address provided in the phishing page or you can say the one who created that phishing page. Phishing page is mostly send via mail. Target of phishing are mostly social networking sites like facebook, orkut etc. Also Banks website to acquire credit card details,website like yahoo, gmail are also target of phishing.
Example of Phishing scams:
- Email asking you to login to your locked account to unlock it.
- Email carrying a Link to sites like Facebook,yahoo etc and asking you to Login.
- Emails containing some Information of your Interest and asking you to Login to Your Account.
How to be safe from phishing ?
- Never login to any of your account through link provided in the Email.
- Go to real website don't click on any link posted anywhere. such as link posted on your facebook wall by friend or link provided in comments or link to certain website on any blog.
- Check the URL of website before entering any sensitive information. Because the URL of phishing page is not same as the URL of real one.
- Real gmail page looks like gmail.com while phishing looks different somthing likegmail.anything.com
Tag :
linux
Use The Google Chrome Flash Plugin in Firefox in Ubuntu
Google Chrome and Firefox are both excellent web browsers. Firefox has for years been gaining in popularity against the long-standing “champion” Internet Explorer, and lately Chrome’s popularity has exploded. They both offer a huge variety of extensions and plugins and both have users who swear by them.
Of course, many users have both web browsers installed, for a variety of reasons. Some have a favorite plugin for one browser that isn’t available for the other, while it is the sad reality that some websites simply work better in one browser than in all the rest. Sometimes having two browsers installed is a necessity.
One advantage Google Chrome has over Firefox is that it is shipped – thanks to a deal between Adobe and Google – with a Flash plugin already installed. This plugin is updated automatically, which means one less thing for the user to be concerned with. For Ubuntu users wanting to take advantage of this, it’s possible to use the Chrome Flash plugin in Firefox as well. Here’s how.
To begin, assuming you already have Google Chrome, Firefox and Adobe Flash installed, we’ll need to either delete the version of Flash (and the configuration tool installed along with it) installed system-wide, or disable Firefox from using it. This is so that – once we point Firefox at the Google Chrome bundled version of Flash – we don’t see the two plugins conflicting.
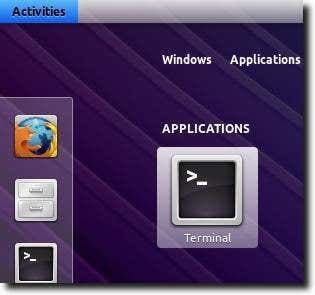
To remove Flash entirely, if that’s what you choose to do, first open a Terminal.
If you’re using a newer version of Ubuntu, there is the Adobe Flash Plugin and Adobe Flash Properties (for either GTK or KDE). Typing sudo apt-get remove adobe-flashplugin adobe-flash-properties-gtkwill remove Flash and GTK Flash Properties control panel, while using adobe-flash-properties-kde(instead of adobe-flash-properites-gtk) will remove the KDE configuration tool.

Once Flash is uninstalled, we need to point Firefox at the Google Chrome version. The Flash plugin used by Google Chrome is located at /opt/google/chrome/libgcflashplugin.so (no matter which version of Google Chrome you’re using). Firefox, on the other hand, looks inside the folder located at/home/username/.mozilla/plugins/ for the Flash plugin. To link the Google Chrome version to this folder, type sudo ln -s /opt/google/chrome/libgcflashplugin.so /home/username/.mozilla/plugins/ into your Terminal.

Note: in the above command, replace “username” with your own username, as shown.
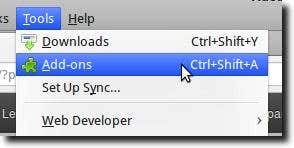
Depending on what version of Google Chrome you have installed, the Chrome Flash version may be newer than your system-wide installed version. If this is the case, you can simply disable Firefox from using the system-wide Flash (while keeping it available for other programs to use), which will then leave Firefox with the newer version that came bundled with Google Chrome. To do this, open Firefox and go to the Add-ons page, by clicking the Tools menu and chosing Add-ons.
Once there, check to see if there are two versions of Flash mentioned. At the moment, the official version of Flash available is 11.1.102.55, while the version shipping with the latest version of Google Chrome (the unstable development channel), is 11.1.202 – a newer version, in other words.
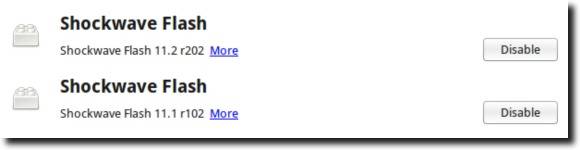
As you can see, both are available for Firefox to use. To force it to use the newer version from Google Chrome, simply click the Disable button.
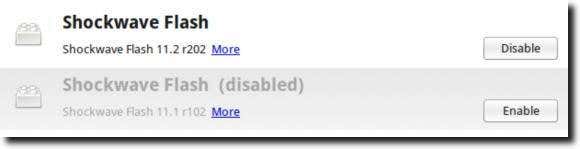
And that’s it! From now on, Google Chrome will keep you up-to-date with the newest version of Flash (sometimes even newer than the version available from the Adobe website, not to mention the Ubuntu repositories). In some instances this won’t mean much, although the newer, Chrome-bundled version does seem to be smoother in playing back videos from ESPN or Hulu, but of course this is only anecdotal.
Tag :
linux
Encrypt Your Flash Drives In Ubuntu Linux Using Disk Utility
It’s amazing how simple flash drives make life. Have a couple songs or documents you need to move from your work computer to your home computer, or from your desktop to your laptop? Simply plug in your flash drive and transfer the files. It only takes seconds, and the flash drive is small enough to throw in your pocket.
Of course, it’s also small enough to forget about entirely, which is the reason flash drives can be such a security risk. Because of this, it’s always a good idea to encrypt the contents of your flash drive. That way, if you forget it in the USB port of your computer, lose your keys or otherwise lose the flash drive, the contents won’t be available to anyone else.
We’ve talked about using TrueCrypt to encrypt the contents of a flash> drive, and for people wanting a cross-platform solution, TrueCrypt is the obvious choice. Whether you run Windows, Mac OS X or Linux, there is a version of TrueCrypt for you. However, if you only run Linux, then things are a whole lot easier. In fact, you probably already have all the software installed on your computer. So here’s how to encrypt the contents of a flash drive in Linux (specifically in Ubuntu).
First, there is one piece of code that is not installed by default, so open up a Terminal and type sudo apt-get install cryptsetup to install it.
This is used to encrypt the drive itself, but also to access the encrypted drive later on. It is a necessary tool that has to be installed on every computer you wish to use your encrypted drive on, so keep that in mind.
The next step is to back up your flash drive to a different drive, whether that’s an external hard drive or to the desktop. Setting up the encrypted flash drive will erase the contents of your flash drive, so if there’s anything important on it, back it up!
Now, go ahead and open up Disk Utility
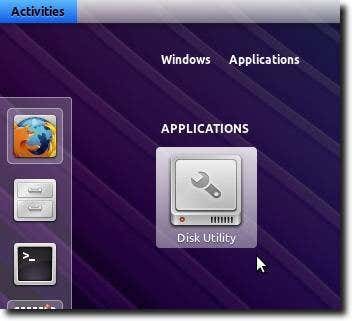
Disk Utility is a general purpose program that can format disks, edit partitions, check filesystems, and more. For our purposes, we’ll use it to format the drive with an encrypted filesystem. When Disk Utility loads, you’ll see your flash drive in the Peripheral Devices section. Go ahead and highlight it, as shown below.

In the rest of the window (once you’ve highlighted the flash drive), you’ll see all kinds of information about the drive.
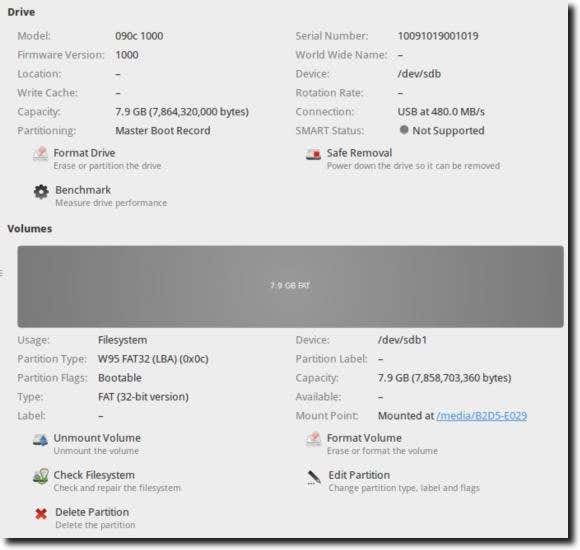
In order to do any modifications to the drive, we need to first unmount it. Near the bottom of the window is the Unmount Volume button; go ahead and click it.

Once unmounted, the drive will still show up in the Peripheral Devices list, but will have disappeared from your desktop. Also, the Unmount Volume button will have changed to a Mount Volume button.
Now it’s time to format the drive. Go ahead and click the Format Volume button (directly across from theMount/Unmount Volume button).
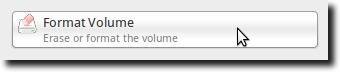
A new window will appear where you can select the filesystem type (NTFS, FAT32, etc.), as well as give the partition a name, take ownership of the system and – importantly for our purposes – encrypt the underlying device. Make sure this last box is checked.

As this process is destructive (anything on the drive will be erased), you’ll be asked to confirm that you want to format the drive. Go ahead and click the Format button to confirm your intentions.

Now you’ll need to provide a passphrase that is the encryption key. Type it twice (the second time to verify you typed it correctly the first time), and then choose how your system should treat this password. In Ubuntu (which uses GNOME), the GNOME Keyring can remember this password forever, until you log out, or forget it immediately. The last is most secure, although if you forget the password, there’s really no getting it back.

There won’t be any progress bar as the process happens, but if you look at the volume info, you’ll notice that it now shows up as being an encrypted volume, and an animated progress spinner as the encryption takes place.

Once this is done, you can take the flash drive out of the computer and plug it back in. When it loads, you’ll see a window similar to this.
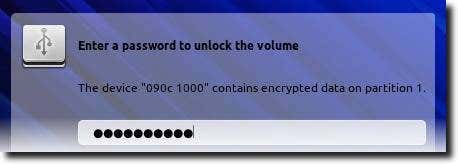
Once you’ve correctly entered the password to unlock the drive, the drive will show up on your Desktop (if that’s your setting), only unlike unencrypted drives, this will show a little padlock (now open because you’ve entered the enryption key).

You can now use it just as you could any other flash drive. Only now, because of the encryption, your data is safe from prying eyes.
Tag :
linux
Use Google Chrome As The Default PDF Viewer In Ubuntu
Google Chrome comes with a lot of features that make it a good choice for many users. This shouldn’t be a big suprise to most people, seeing as how it has become more and more popular over the past year, but consider that Chrome not only comes bundled with a built-in Adobe Flash plugin (which can also be used with Firefox, as we discussed), but a PDF viewer as well. That means you no longer need to install Flash separately, and no longer need to use a plugin such as the Adobe Reader PDF plugin, for when you encounter a PDF on the Web.
The Chrome PDF plugin isn’t a replacement for Adobe Reader, of course. It is a simple viewer, and not in any way a PDF editor, but for simple viewing, it’s a good option. And unlike the Adobe Reader plugin, which is often fairly slow to load, the Chrome PDF plugin is quite speedy.
In fact, it’s so good that you can actually use it as your default PDF viewer for your Desktop, should you want. You won’t be able to use it if you need to fill in forms, but it’s capable enough for basic viewing, or for copying text from a PDF, if you want. Here’s how to set it up as your default viewer in Ubuntu.
First, find a PDF on your Desktop and right-click it. You’ll likely see a menu similar to this.
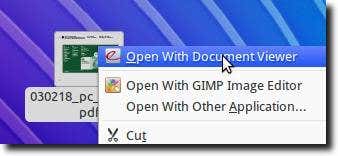
As you can see, there are two programs registered as being able to read PDF documents: Evince (identified as Document Viewer in the above screenshot), and GIMP. Google Chrome is not on that list, even though if you opened Chrome and selected a PDF after hitting Ctrl-O, it would open it just fine. What we need to do, then, is add Google Chrome to the list of PDF viewers installed on our computer, then set it as the default.
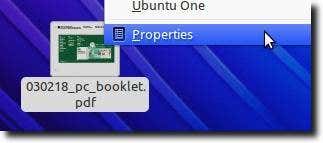
So, right-click again, and choose Properties (which should be at, or very near, the very bottom of the menu).
The following window will appear.
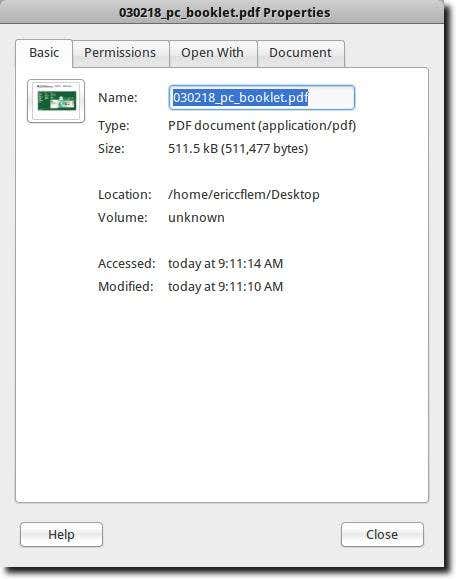
Now click the Open With tab.

You’ll be shown a list of the available programs to view the document, as well as which is the default. Again, you’ll notice Google Chrome is not in that list, or at least it isn’t there yet.

To add Google Chrome to the list, click the Show other applications button.

You’ll now see a nearly complete list of all the programs installed on your computer. Scroll down until you find Google Chrome
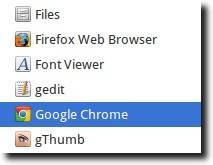
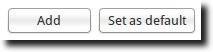
Once you’ve highlighted it (as shown above), you can either click the Add button, which will add it to your list of available programs for PDF files (but leave the default as is), or the Set as default button, which will do what you’d expect.
You should now see Google Chrome in your list, identified as either the Default Application (if you clicked the Set as default button), or as one of the Recommended Applications (if you only clicked the Addbutton, as you wanted it to be easily available, but not your default).
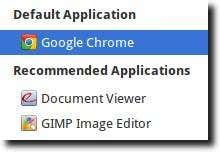
As you can see, we set it as our default, but if we hadn’t, it would still be one of the visible options in the right-click menu shown for any PDF.
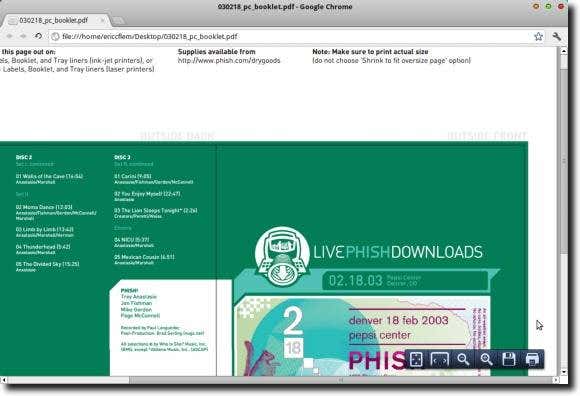
However, since we set it as our default, we only need to double-click any PDF file on our computer and Google Chrome will be used to display it, just as we wanted.
Tag :
linux
Change the GNOME Keyring Password For Easier Automatic Login
In Linux, as in Mac OS X, user passwords are stored in a keyring; in Ubuntu this is known as GNOME Keyring, while in Kubuntu, which uses the KDE desktop environment, it is known as Wallet. Regardless, passwords of all sorts, from your wireless router’s key to your Gmail login, are stored in this keyring. They are only available when the keyring is unlocked. Generally this happens when the user logs into his or her account.
The problem comes when a user turns on automatic login. When automatic login is turned on, a user doesn’t need to log into the computer; his or her account loads automatically. This is a nice feature for single-user computers. However, it does have a drawback; when automatic login is turned on, the keyring is not unlocked, so any passwords that are usually entered automatically (such as the password for the wireless network), can’t be accessed until a user enters the keyring password manually… which kind of defeats the purpose of logging in automatically!
In this article we’ll first show how to turn on automatic login, and then how to change the login password so that entering it immediately after automatic login is no longer necessary.
Warning: there is a security risk involved with doing this. Namely, the process involves changing the keyring password from something presumably secure to completely blank. In other words, if someone were to gain physical access to your computer, all of your other passwords will be stored unencrypted (they will be stored in a plain text file). So this should only be done on a home computer, for starters, and one that the owner is fairly certain is secure.
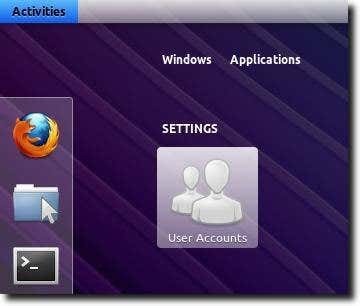
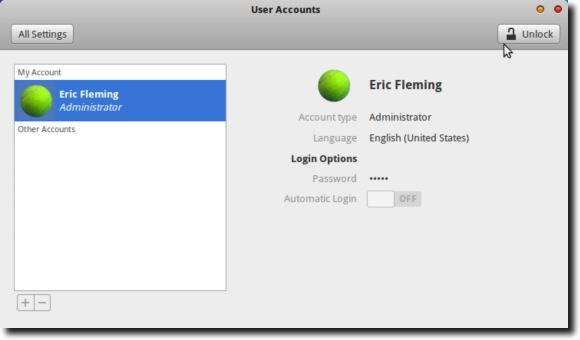
That said, the first step is to turn on automatic login. To do so, open up the User Accounts control panel.
Next, highlight the user who will be logged in automatically, and then click the Unlock button to make changes to that account.
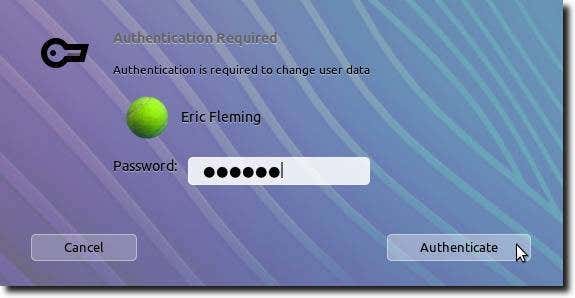
Next, enter the administrator password when asked.
Finally, click the slider to turn on Automatic Login.
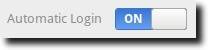
That part is now finished; the next time the computer is started up or rebooted, the user whose account was just changed will be logged in automatically.
Unfortunately, if the computer uses a wireless computer with password encryption, the user will immediately be asked to provide the login password so that the wireless network password will be available.

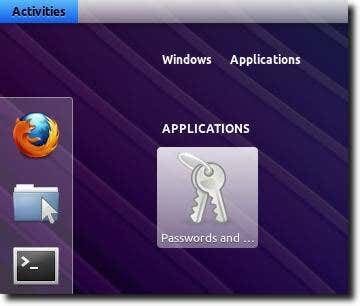
So now we need to change the keyring password. To do this, we’ll need to open Seahorse (which is calledPasswords and Keys). Typing either “Seahorse” or “Passwords and Keys” into the GNOME Shell Dash or Ubuntu Unity should bring up the control panel.
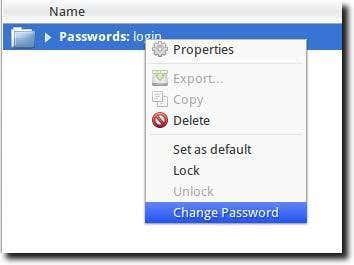
Here you’ll find a list of available passwords and keys. As shown below, find the one named simply Loginand right-click it, then choose the Change Password option.
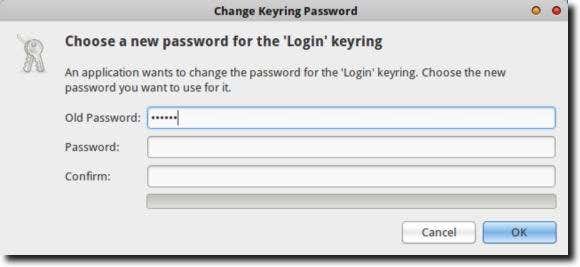
Now type your original password in the top line. Instead of typing in a new password – as the dialog assumes you will do, simply ignore the text fields for the new password and click the OK button.
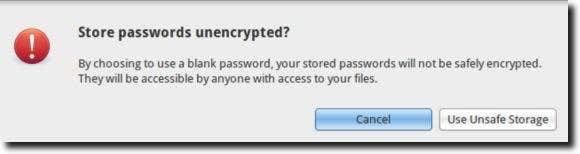
Your computer obviously doesn’t want to do this – because of the aforementioned security risk – and will ask you to confirm that you do want to take the risk of unencrypted passwords. For our purposes this is what we want, so go ahead and click the Use Unsafe Storage button.
After this, go ahead and quit Seahorse; we’re finished! The next time you start up or reboot, you’ll not only be logged in, but all of your keyring passwords will be available, right from the start. As mentioned, this procedure does involve a security risk, but for those wanting to automatically login to their user account and not have to deal with immediately entering the Keyring password, it’s the way to go.
Tag :
linux
Add a New Default Search Engine To Google Chrome Web Browser-Ubuntu
There are quite a few popular search engines available today, and each have their fans. Google is easily the most popular, but Bing and Yahoo are also used by millions of users every day. So it’s nice to be able to choose which you’ll use by default, and Google Chrome makes that easy? How easy? Let’s say you’ve just installed it; go ahead and launch it for the first time.

You’ll see this window, asking you to select your default search engine.

Once you’ve selected a search engine, from now on when you type a search query into the URL bar, it is that engine which will be used. But what if you don’t want Google, Yahoo or Bing to be your default? What if you’ve gotten used to searching as Ask.com, or want to try out DuckDuckGo or Dogpile or… any other search engine? You can! Simply click the Gears menu, then choose the Preferences option.

Now, from the Basics tab (check along the left sidebar; it should be one highlighted by default when you open the Preferences interface), choose the Manage Search Engines option.

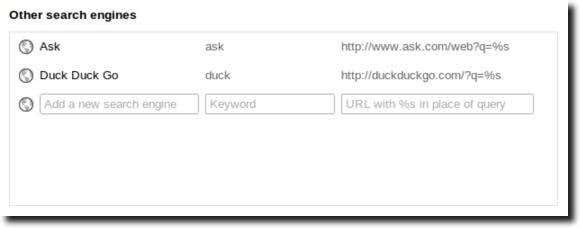
When this pop-up appears, you’ll see the three default search engines in the top box, with room to add other engines in the bottom box.

To add a search engine, we need to give it a name, a keyword, and a search URL. You can see the three spots in the above image. Below, you can see that we’ve added two search engines.
The three bits of info you need are pretty explanatory. The only one which could cause much trouble is the search URL. This is a bit of text (a web address with a spot open for your search query) that Chrome sends to the search engine to produce your search results. How do we find this URL? Simply go to the search engine you wish to add, search for something simple (we searched for “hello” in our examples), and then copy the URL of the results page.
Here is what the results page looks like at duckduckgo.com:

Here is what you’ll see when Ask is your search engine.

To add that URL to Google Chrome, simply copy it down. The only thing to remember is that went entering the URL, replace what you searched for (in order to find the URL in the first place), with “%s” (without the quotes). You can see that we did this in our examples earlier.
Once you’ve added a search engine or two, how do you set one as the default? Simply hover over it, then click the blue Make Default button that appears.

When you’ve done that, your newly-added search engines will now appear in the Default Search Optionslist.

One last note of explanation: keywords. Keywords are great. If you have a few search engines entered (as we do), you may find yourself wanting to search another. Maybe you have a Wikipedia search engine installed. To use it, assuming “wiki” is your keyword, you would just type wiki then hit space and the URL bar will change slightly so that whatever you type next will be searched for at Wikipedia. Here’s what it looks like when using our Ask.com keyword, even though DuckDuckGo is our default search engine.

Keywords are a great way to refine your search using the search engine of your choice, without making it the new default. So use this tutorial to add all the specialty search engines you want (how about adding an Amazon or eBay search engine to find your favorite products, new and used?). You’ll find yourself searching faster, and better, than ever before.
Tag :
linux
