It’s amazing how simple flash drives make life. Have a couple songs or documents you need to move from your work computer to your home computer, or from your desktop to your laptop? Simply plug in your flash drive and transfer the files. It only takes seconds, and the flash drive is small enough to throw in your pocket.
Of course, it’s also small enough to forget about entirely, which is the reason flash drives can be such a security risk. Because of this, it’s always a good idea to encrypt the contents of your flash drive. That way, if you forget it in the USB port of your computer, lose your keys or otherwise lose the flash drive, the contents won’t be available to anyone else.
We’ve talked about using TrueCrypt to encrypt the contents of a flash> drive, and for people wanting a cross-platform solution, TrueCrypt is the obvious choice. Whether you run Windows, Mac OS X or Linux, there is a version of TrueCrypt for you. However, if you only run Linux, then things are a whole lot easier. In fact, you probably already have all the software installed on your computer. So here’s how to encrypt the contents of a flash drive in Linux (specifically in Ubuntu).
First, there is one piece of code that is not installed by default, so open up a Terminal and type sudo apt-get install cryptsetup to install it.
This is used to encrypt the drive itself, but also to access the encrypted drive later on. It is a necessary tool that has to be installed on every computer you wish to use your encrypted drive on, so keep that in mind.
The next step is to back up your flash drive to a different drive, whether that’s an external hard drive or to the desktop. Setting up the encrypted flash drive will erase the contents of your flash drive, so if there’s anything important on it, back it up!
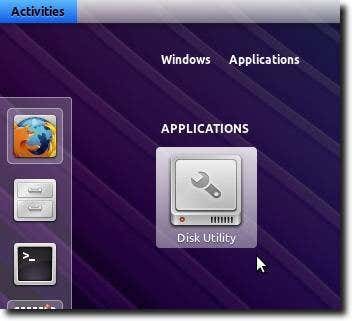
Now, go ahead and open up Disk Utility
Disk Utility is a general purpose program that can format disks, edit partitions, check filesystems, and more. For our purposes, we’ll use it to format the drive with an encrypted filesystem. When Disk Utility loads, you’ll see your flash drive in the Peripheral Devices section. Go ahead and highlight it, as shown below.

In the rest of the window (once you’ve highlighted the flash drive), you’ll see all kinds of information about the drive.
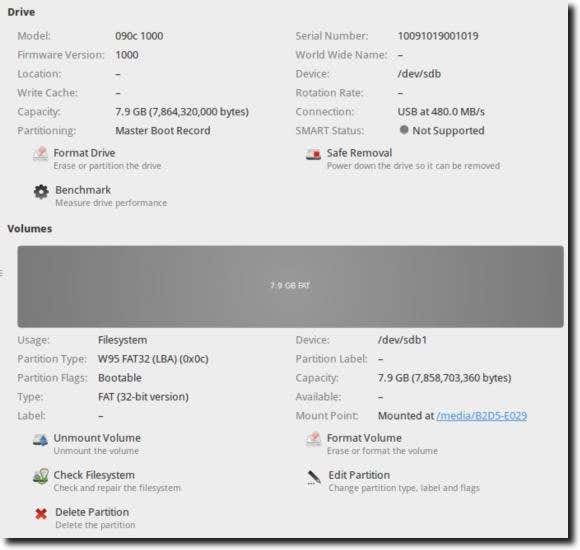
In order to do any modifications to the drive, we need to first unmount it. Near the bottom of the window is the Unmount Volume button; go ahead and click it.

Once unmounted, the drive will still show up in the Peripheral Devices list, but will have disappeared from your desktop. Also, the Unmount Volume button will have changed to a Mount Volume button.
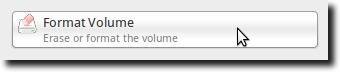
Now it’s time to format the drive. Go ahead and click the Format Volume button (directly across from theMount/Unmount Volume button).
A new window will appear where you can select the filesystem type (NTFS, FAT32, etc.), as well as give the partition a name, take ownership of the system and – importantly for our purposes – encrypt the underlying device. Make sure this last box is checked.

As this process is destructive (anything on the drive will be erased), you’ll be asked to confirm that you want to format the drive. Go ahead and click the Format button to confirm your intentions.

Now you’ll need to provide a passphrase that is the encryption key. Type it twice (the second time to verify you typed it correctly the first time), and then choose how your system should treat this password. In Ubuntu (which uses GNOME), the GNOME Keyring can remember this password forever, until you log out, or forget it immediately. The last is most secure, although if you forget the password, there’s really no getting it back.

There won’t be any progress bar as the process happens, but if you look at the volume info, you’ll notice that it now shows up as being an encrypted volume, and an animated progress spinner as the encryption takes place.

Once this is done, you can take the flash drive out of the computer and plug it back in. When it loads, you’ll see a window similar to this.
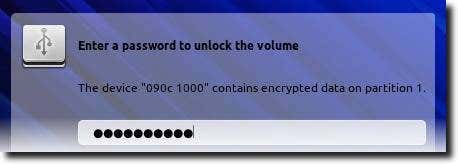
Once you’ve correctly entered the password to unlock the drive, the drive will show up on your Desktop (if that’s your setting), only unlike unencrypted drives, this will show a little padlock (now open because you’ve entered the enryption key).

You can now use it just as you could any other flash drive. Only now, because of the encryption, your data is safe from prying eyes.


