- Back to Home »
- linux »
- Change the GNOME Keyring Password For Easier Automatic Login
Posted by : Unknown
In Linux, as in Mac OS X, user passwords are stored in a keyring; in Ubuntu this is known as GNOME Keyring, while in Kubuntu, which uses the KDE desktop environment, it is known as Wallet. Regardless, passwords of all sorts, from your wireless router’s key to your Gmail login, are stored in this keyring. They are only available when the keyring is unlocked. Generally this happens when the user logs into his or her account.
The problem comes when a user turns on automatic login. When automatic login is turned on, a user doesn’t need to log into the computer; his or her account loads automatically. This is a nice feature for single-user computers. However, it does have a drawback; when automatic login is turned on, the keyring is not unlocked, so any passwords that are usually entered automatically (such as the password for the wireless network), can’t be accessed until a user enters the keyring password manually… which kind of defeats the purpose of logging in automatically!
In this article we’ll first show how to turn on automatic login, and then how to change the login password so that entering it immediately after automatic login is no longer necessary.
Warning: there is a security risk involved with doing this. Namely, the process involves changing the keyring password from something presumably secure to completely blank. In other words, if someone were to gain physical access to your computer, all of your other passwords will be stored unencrypted (they will be stored in a plain text file). So this should only be done on a home computer, for starters, and one that the owner is fairly certain is secure.
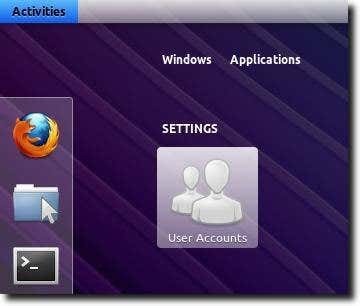
That said, the first step is to turn on automatic login. To do so, open up the User Accounts control panel.
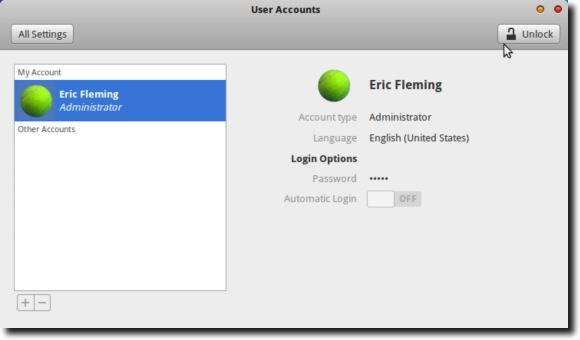
Next, highlight the user who will be logged in automatically, and then click the Unlock button to make changes to that account.
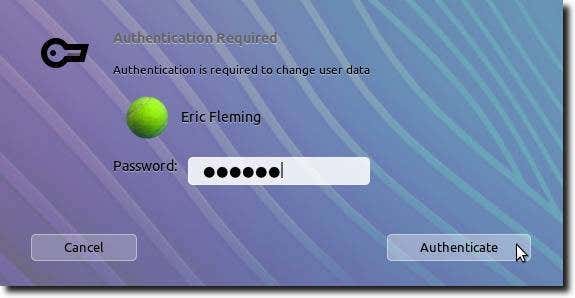
Next, enter the administrator password when asked.
Finally, click the slider to turn on Automatic Login.

That part is now finished; the next time the computer is started up or rebooted, the user whose account was just changed will be logged in automatically.
Unfortunately, if the computer uses a wireless computer with password encryption, the user will immediately be asked to provide the login password so that the wireless network password will be available.
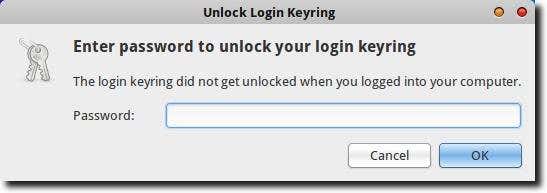
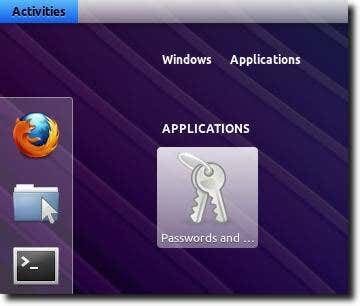
So now we need to change the keyring password. To do this, we’ll need to open Seahorse (which is calledPasswords and Keys). Typing either “Seahorse” or “Passwords and Keys” into the GNOME Shell Dash or Ubuntu Unity should bring up the control panel.
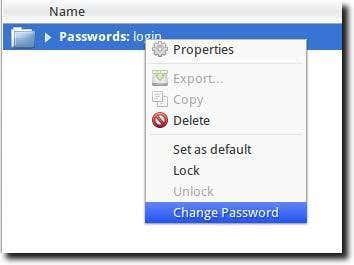
Here you’ll find a list of available passwords and keys. As shown below, find the one named simply Loginand right-click it, then choose the Change Password option.
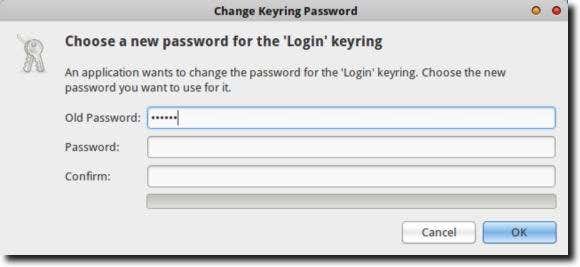
Now type your original password in the top line. Instead of typing in a new password – as the dialog assumes you will do, simply ignore the text fields for the new password and click the OK button.
Your computer obviously doesn’t want to do this – because of the aforementioned security risk – and will ask you to confirm that you do want to take the risk of unencrypted passwords. For our purposes this is what we want, so go ahead and click the Use Unsafe Storage button.

After this, go ahead and quit Seahorse; we’re finished! The next time you start up or reboot, you’ll not only be logged in, but all of your keyring passwords will be available, right from the start. As mentioned, this procedure does involve a security risk, but for those wanting to automatically login to their user account and not have to deal with immediately entering the Keyring password, it’s the way to go.
Categories
Blog Archive
-
2014
(79)
- August (1)
- June (5)
- May (20)
-
April
(43)
- Basic Terminal Commands For Linux
- Websites To Learn Computer Programming Languages
- Keyloggers And How To Be Safe From Keyloggers
- 6 Most Common Password Cracking Methods And Their ...
- What Is Phishing And How To Be Safe From Phishing ?
- Remove All Your Google Web History
- Hide Files Behind The Images
- Best Call Recorder for iPhone to Record Conversations
- jailbreak iDevice running iOS 7 using evasi0n7 [Wi...
- Add Folders and Software to My Computer in Windows...
- Make any Window transparent using a keyboard Short...
- Get Taskbar transparency in Windows 8
- View India in 360 with WoNoBo.com or with there An...
- How to Block Ads on Android Apps, Games and Browser’s
- Retrieve Your Wireless Network Security Key in Win...
- Use Alternate DNS Servers In Windows For Faster In...
- Use The Google Chrome Flash Plugin in Firefox in U...
- Encrypt Your Flash Drives In Ubuntu Linux Using Di...
- Use Google Chrome As The Default PDF Viewer In Ubuntu
- Change the GNOME Keyring Password For Easier Autom...
- Add a New Default Search Engine To Google Chrome W...
- Change the Default LightDM Background Image In Ubuntu
- Turn Off The Startup Sound In Windows Vista and Wi...
- Find, View and Analyze BSOD Dump Files
- Disable Aero (Permanently or Temporarily) in Windo...
- Change the Windows 7 Login Image without Editing t...
- Getting Started With Google Drive For Windows
- Use Google Web Fonts in the Google Docs Word Proce...
- Merge Two Partitions in Windows
- Change Where Chrome Downloads Files To
- View Photo EXIF Metadata on iPhone, Mac, and Windows
- Track Your iPhone, iPad, and Mac Computer
- Remove Duplicate Contacts on iPhone
- Create a Multiple Operating System Bootable USB Drive
- Guide to Taking Screenshots in Windows 8
- 99 Ways to Make Your Computer Fast
- Tips to Avoid Installing Browser Extensions with A...
- Some methods to Make Sure No One is Monitoring You...
- Get back the corrupted files in pendrive without a...
- Download YouTube videos using VLC media player wit...
- HIDE A FOLDER IN NOKIA PHONE WITHOUT ANY SOFTWARE
- Some Common Internet Error Codes With Meanings
- CCleaner is Now Available for Android
- March (10)


