- Back to Home »
- windows tricks »
- Guide to Taking Screenshots in Windows 8
Posted by : Unknown
Taking screenshots has always been fun in Windows, especially with Windows Vista and 7, which included the new Snipping Tool. Basically, since Vista, there have been two ways to take screenshots in Windows without third-party software: using keyboard shortcuts or using the Snipping Tool.
Before Windows 8, it was very complicated to take screenshots of the entire screen or even of specific regions of the screen. With Windows 8, you have something else to consider: Windows store apps aka Metro apps. How do you take a screenshot of a Metro app? What if you just want a specific region of the app and not the whole screen? In this article, I’ll go through all the possible ways to capture a screenshot in Windows 8.
The Usual Suspects
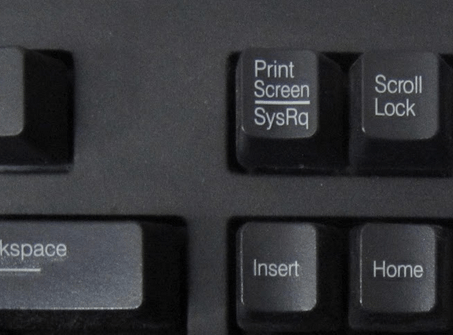
Don’t worry, good ol Prt Scrn and Alt + Prt Scrn still work in Windows 8. You can use Prt Scrn on the desktop or in a Windows Store app and it will take a screenshot of the entire screen and save it to the clipboard. Alt + Prt Scrn will take a screenshot of the active window, which only makes sense on the traditional desktop. If you press that on a Windows app, it will just take a full screen capture.

Windows Key + Prt Scrn
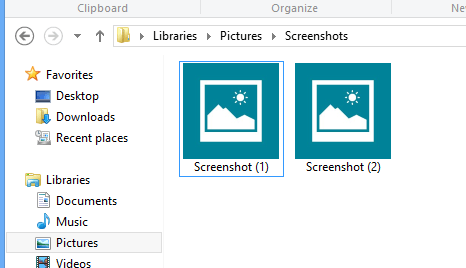
In Windows 8, there is also a new keyboard shortcut added which is Windows key + Prt Scrn. This is a nifty little shortcut that captures the entire screen and automatically saves it to your Pictures folder underScreenshots. It saves the file as a PNG file.

Snipping Tool
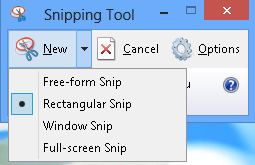
The snipping tool in Windows 8 is pretty much the same as with previous versions of Windows. To open the Snipping Tool in Windows 8, just go to the Start Screen and start typing snipping. You can choose from four different options to capture your screenshot: free-form, rectangular, window, and full-screen.

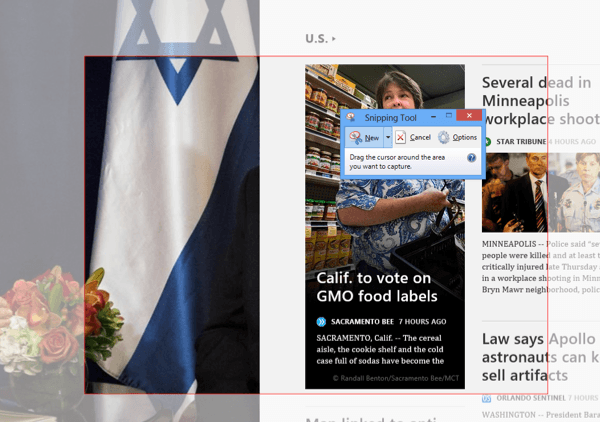
You can take screenshots of Metro apps by first opening the Snipping Tool and then going back and opening your Metro app. While in the Metro app, go ahead and press CTRL + Prt Scrn. Windows 8 will quickly switch back to the desktop where you have the snipping tool open and then switch back to the Metro app with the screen overlay. Now you can start capturing depending on what option you chose.

Note that if Windows 8 does not automatically switch you back to the Metro app, you can press Windows Key + TAB to get your back there. Lastly, if you want to capture a right-click context menu in Windows 8, you can use the same trick. Just open the Snipping Tool on the desktop, then right-click on wherever you want and press CTRL + Prt Scrn. You’ll then be able to capture the right-click context menu.
Unfortunately, that’s about all there is to capturing screenshots in Windows 8. Of course, there are a ton of third-party apps for capturing screenshots and you’ll need those if you want to capture a video of your screen, for example. Enjoy!
Categories
Blog Archive
-
2014
(79)
- August (1)
- June (5)
- May (20)
-
April
(43)
- Basic Terminal Commands For Linux
- Websites To Learn Computer Programming Languages
- Keyloggers And How To Be Safe From Keyloggers
- 6 Most Common Password Cracking Methods And Their ...
- What Is Phishing And How To Be Safe From Phishing ?
- Remove All Your Google Web History
- Hide Files Behind The Images
- Best Call Recorder for iPhone to Record Conversations
- jailbreak iDevice running iOS 7 using evasi0n7 [Wi...
- Add Folders and Software to My Computer in Windows...
- Make any Window transparent using a keyboard Short...
- Get Taskbar transparency in Windows 8
- View India in 360 with WoNoBo.com or with there An...
- How to Block Ads on Android Apps, Games and Browser’s
- Retrieve Your Wireless Network Security Key in Win...
- Use Alternate DNS Servers In Windows For Faster In...
- Use The Google Chrome Flash Plugin in Firefox in U...
- Encrypt Your Flash Drives In Ubuntu Linux Using Di...
- Use Google Chrome As The Default PDF Viewer In Ubuntu
- Change the GNOME Keyring Password For Easier Autom...
- Add a New Default Search Engine To Google Chrome W...
- Change the Default LightDM Background Image In Ubuntu
- Turn Off The Startup Sound In Windows Vista and Wi...
- Find, View and Analyze BSOD Dump Files
- Disable Aero (Permanently or Temporarily) in Windo...
- Change the Windows 7 Login Image without Editing t...
- Getting Started With Google Drive For Windows
- Use Google Web Fonts in the Google Docs Word Proce...
- Merge Two Partitions in Windows
- Change Where Chrome Downloads Files To
- View Photo EXIF Metadata on iPhone, Mac, and Windows
- Track Your iPhone, iPad, and Mac Computer
- Remove Duplicate Contacts on iPhone
- Create a Multiple Operating System Bootable USB Drive
- Guide to Taking Screenshots in Windows 8
- 99 Ways to Make Your Computer Fast
- Tips to Avoid Installing Browser Extensions with A...
- Some methods to Make Sure No One is Monitoring You...
- Get back the corrupted files in pendrive without a...
- Download YouTube videos using VLC media player wit...
- HIDE A FOLDER IN NOKIA PHONE WITHOUT ANY SOFTWARE
- Some Common Internet Error Codes With Meanings
- CCleaner is Now Available for Android
- March (10)


